2011. május 9., hétfő

Muffins Made With Chocolate and Bananas


Welcome back!!!

So, my presentation of the project is due tomorrow...
and I thought, I should prepare something nice, that smells good and looks good. Something visual, that is more than a picture.

So, I took time and decided on making chocolate and banana muffins! I have not made them in such a long time, I think it has been more than three years now, since I first made them. And I thought, everybody should like chocolate and bananas, so... we shall see tomorrow, how people rate my muffins. :)


It is a simple and easy recipe, by the way. So, if you liked it (my classmates) then try it at home!!!

The INGREDIENTS:
- 1 big banana (the real yellow kind, no green bananas!)
- 250 ml milk
- 1 egg
- 60 ml melted margarine (take pieces of margarine and melt it piece by piece, because honestly I had no idea how much you need to make 60 ML..., and when that is done, measure 60 ml)
- 185 gram flour
- 120 gram powdered sugar
- 120 gram chocolate
- 1 and a half teaspoon of baking powder


(I tripled the ingredients, because I wanted to make enough for the class and the family. It resulted in 42 muffins)

STEP 1:

- We should put the bananas into a bowl and then mash them with a fork.


STEP 2:

- Add the milk, egg and melted margarine to the mashed banana and mix it well.


STEP 3:

- Add the flour, the baking powder, and the powdered sugar to the milky cream.


STEP 4:

- Chop up the chocolate into small pieces and mix it to the dough.


STEP 5:

- When that is done, find the muffin pan and hopefully you have muffin paper... I did, thank God! :) So I did not have to grease the pan with oil or butter. Put the dough into the muffin pan.


STEP 6:

- Bake the muffins on 190 Celsius for about 20 minutes.


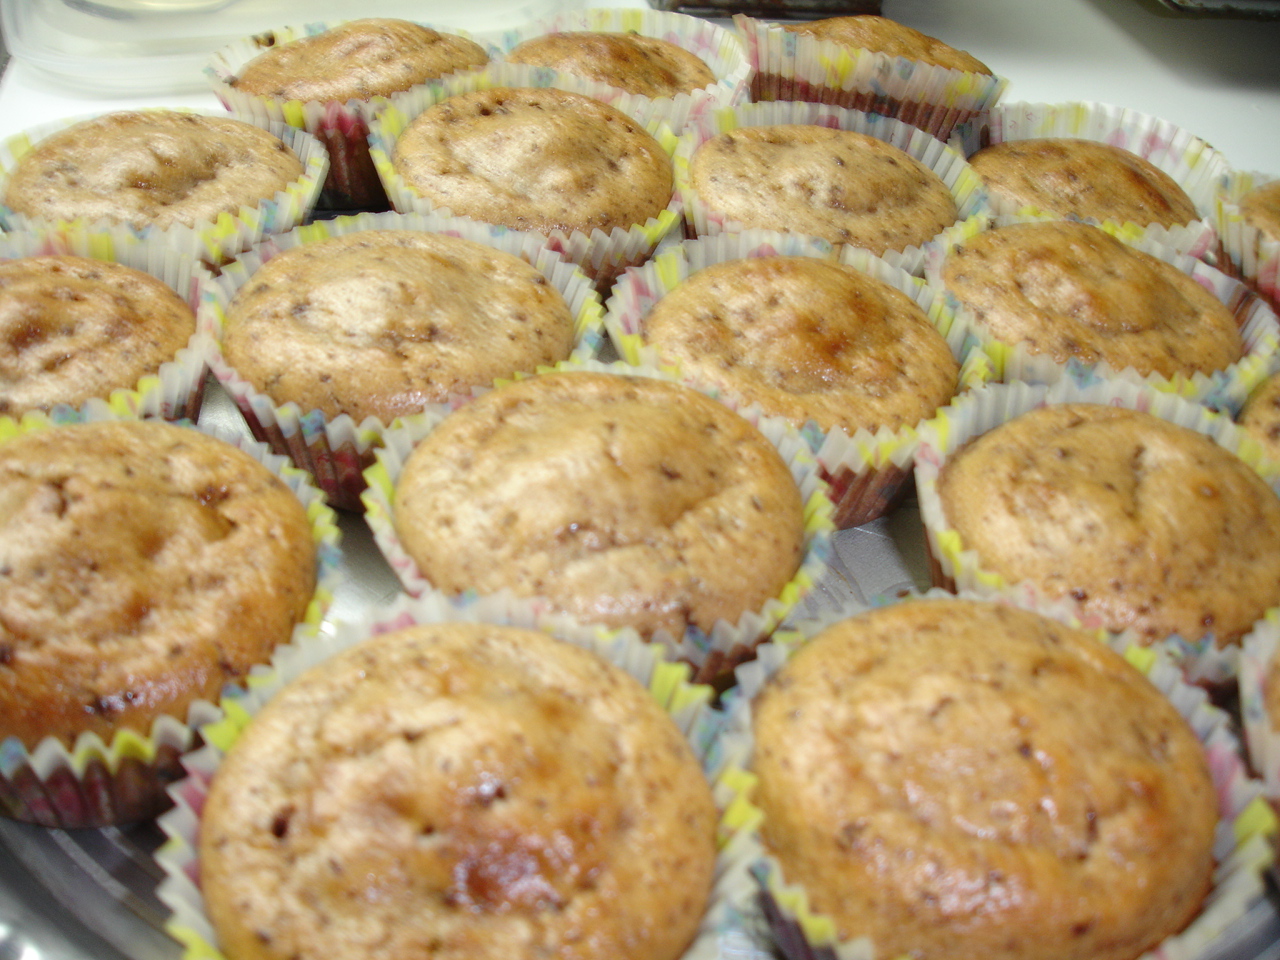
Wait for it to cool a little, and then serve!


It seems, that the family loved it. They already ate all the ones I made for them, and I only made it about an hour ago... So hopefully, the class will be satisfied tomorrow!

Thanks Guys for eating my muffins! :)

2011. május 2., hétfő

The Nutella Bomb! I should call it...

Hey All!

So, this is my fifth blog about desserts.
It seems that I kind of lied when I first made this blog... 3 of 5 desserts did not even touch the oven. (I hope that's not a problem, though!)
So, I should not probably call it 'bake for fun' but rather something like 'eat for fun.'
Well anyway... I'm not going to say, that this is my last 'baking' blog... because I have plans about continuing it.
But my project is done, therefore, it is time to share with you the final dessert of my project!

So, my last choice of desserts is the Nutella Bomb!
Honestly, I did not know the actual name of this dish, so I made one up for it. But if you happen to be familiar with this dessert, then please tell me what name you know it by! Thank you!!! But for now, let's just stick with 'Nutella Bomb!'

So, the ingredients needed, are the following:
- 1 package of lady fingers (We've already used this when we made Zuppa Inglese);)
- 3 dl milk
- 1 dl rum or use aroma
-1 glass of nutella (the small kind, 400 g)
- 1 Mascarpone cheese (500 g) /this cheese is used for making tiramisu)
- 1 liter of whipped cream (it's in the state of simple cream first, and then we whip it at home)
- any  kind of fruit. I chose strawberries. :) but it is very good with cherry, or any red or dark fruit.


 We need a big glass bowl. (it turned out, that mine was NOT big enough...)

Step 1:
 - We need to mix the rum aroma with the milk.
- Then we can put the lady fingers one by one into the milk, but only for a period of 15 seconds at the most! Otherwise, it will melt. It should only be soaked for 15 seconds! Don't forget!!!!   Don't use too much at a time, because we will need to do a little bit of layering.


 Step 2: 
- Then we should put the lady fingers into the bowl, as one layer.


Step 3:
- Now it's time to work with the nutella and the mascarpone cheese. We should mix it together!


Step 4:
- When that is all done, we should put a layer of nutella- cheese cream on top of the lady fingers.
And then top that with a layer of fruits.


(sorry, my camera went stupid... and I didn't realize how blurry my pictures were.)


Step 5: 
- When we layered the fruits, we should whip the cream and put that on top of the fruits.


Step 6:
- We need to start the layering from the very beginning!

First the lady fingers and the nutella-cheese cream:

Then the strawberries and the whipped cream!


We could continue on for at least three layers, and we could be eating this for a week! 
But my bowl was not big enough, so I could only do two layers of everything.
If you want to, you can top the strawberries with more whipped cream. 
 I thought it looked the best with the fruits on the very top.

I hope you liked this dessert also, and if you'll ever decide on making it, it will satisfy your expectations!

Thanks for keeping up with me throughout my project! :)

Viki